Physical Features:
From the top and bottom, the MC1 and MC1 Pro look very similar. The two coolers are 24mm wide and 74mm long and the tops are covered almost entirely by a finned heatsink.
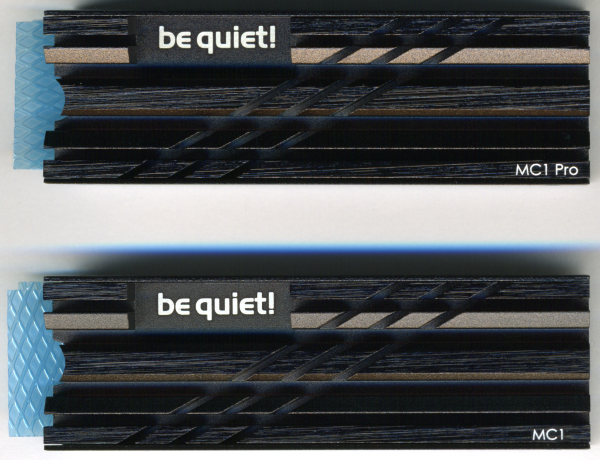

From the side, you can see the biggest difference between the MC1 and MC1 Pro. Where the MC1 is 11mm tall with a double-sided SSD installed, the MC1 Pro is 15mm tall. At this height, the MC1 Pro is too tall to fit in the PS5 like the MC1. You'll also want to make sure that it doesn't interfere with your video card if the motherboard's M.2 slot is below it.

The MC1 Pro's extra height is due to its heatpipe, which runs up and down the length of the top of the cooler. The heatpipe is covered almost entirely by a large thermal pad. However, you can see it on the end of the cooler.
Setup:
Installing an SSD in be quiet!'s MC1 and MC1 Pro coolers is very easy. To begin, remove the blue, protective covering from the thermal pad on the back plate. From there, you can place your SSD onto the pad. You'll want to make sure that the cut outs for the screws are lined up.

The next step is to remove the protective covering from the thermal pad on the upper portion of the cooler. With that out of the way, you can place the upper portion of the cooler onto the SSD and then screw it into place using the included screws and screwdriver.

With the cooler now installed, you can put the SSD into an M.2 slot on your computer's motherboard or, in the case of the MC1, your PS5. As I mentioned earlier, you'll want to make sure that the cooler does not interfere with any of the components around the slot or something like a video card that may be above it.
